Theory
Theoretical considerations...
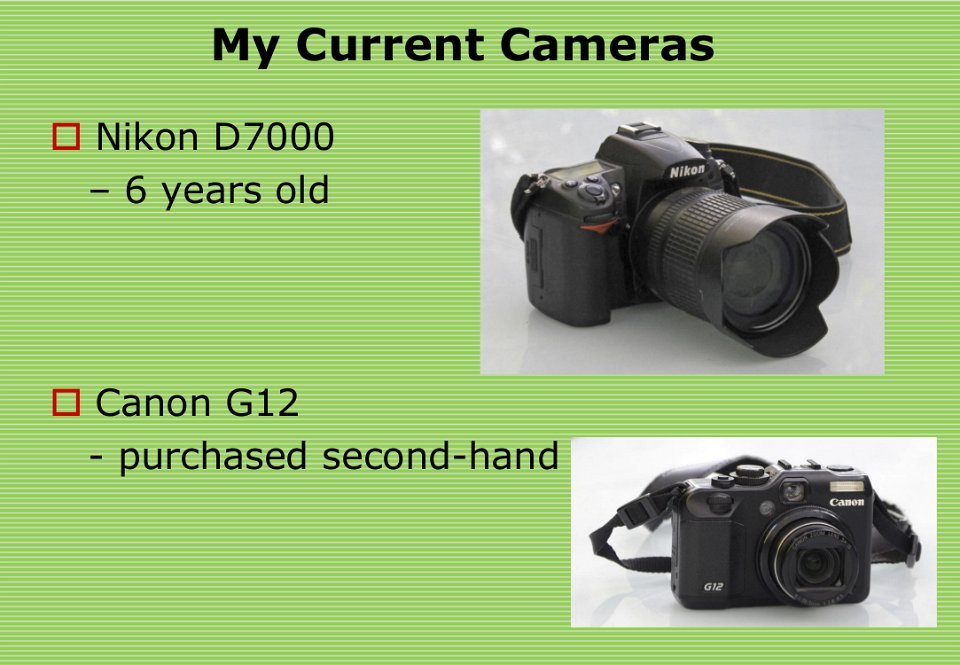
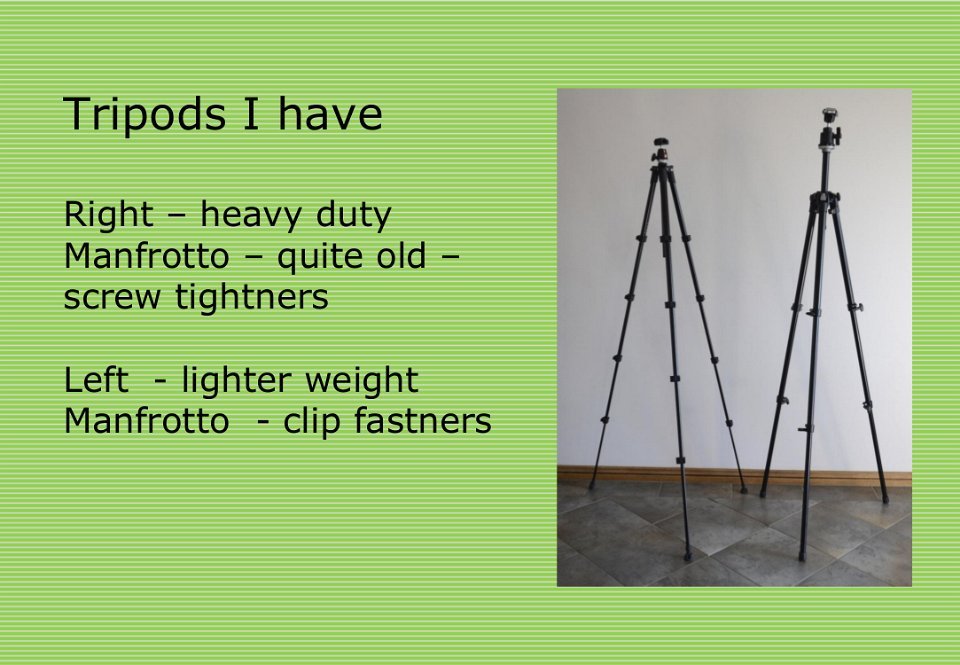
Nikon D7000 – bought about 6 years ago as a replacement for my earlier Nikon D70S – its quite large and heavy which are its main drawbacks.
Canon G12 – this camera was recommended by Phil Parker during his visit 3 years ago, so I purchased a second-hand one for $150. It has a manual mode so that you can use the smallest aperture which is only f/8 – doesn’t sound particularly small but the small sensor format of these cameras provides a greater depth of field because the degree of magnification required is less.
Anyone taking close up photographs knows that depth of field reduces dramatically when closing in on a subject for exactly the same reason. Magnification increases as subject distance is reduced and depth of field reduces also.
Magnification in this context means the ratio of the subject height to the height of the image formed. Thus, the smaller the image format of the camera, the greater the depth of field, all other factors being equal (f-ratio, distance, and lens angle of view). Compact digital cameras with extremely tiny sensors inherently give greater depth of field, even when fitted with a wide-aperture lens.
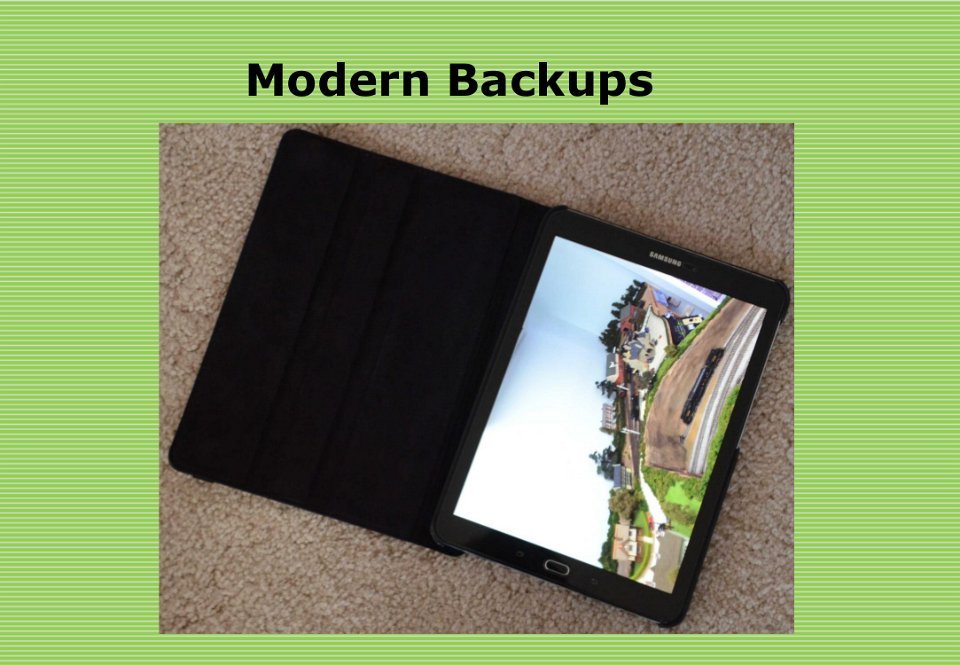
My Samsung tablet can be used but is not my preference for model railway photography. The rear camera in the Samsung Galaxy S2 is 8MP so it can be used as a back up.
Of course a smart phone can be used and some of the recent ones have really good cameras but from what I’ve seen they’re still not ideal for model photography – I might be proved wrong?
Samsung Galaxy S2 – backup if all else fails.
I don’t have a smart phone – I’ve tried to stay away from that so my mobile phone‘s camera is virtually useless. Gavin Thrum took a lot of photos on his I-phone whilst we were in the UK earlier in the year but wasn’t overly happy with the model photos I think.
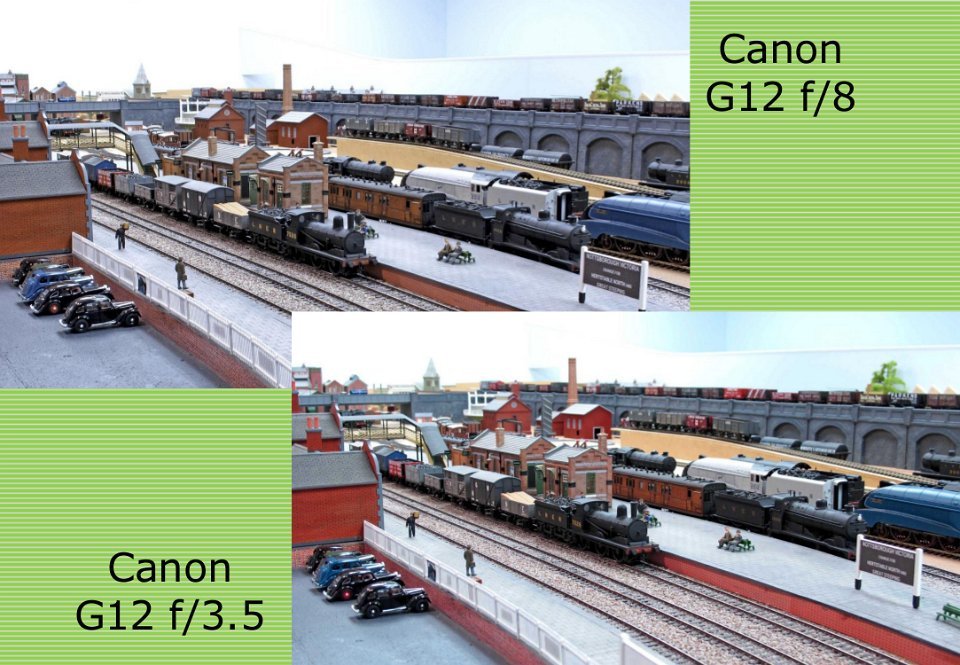
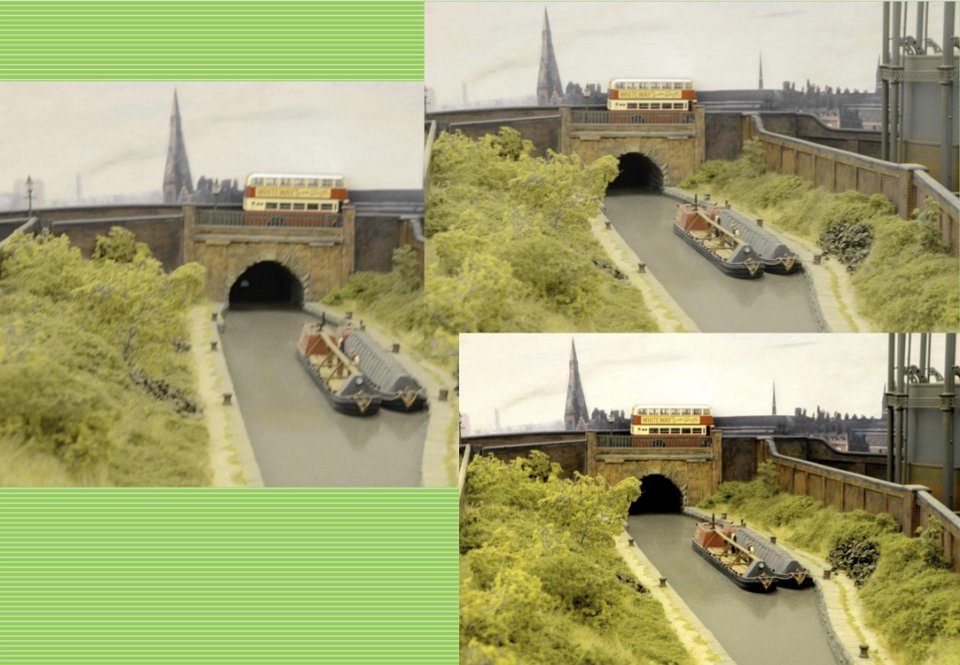
Comparison between smallest aperture on the Canon and a larger aperture (it actually opens out to f2.8) but you can see there is not that much difference between f8 and f3.5. Look closely at the station nameboard in the bottom right corner and the church and chimney in the background for the comparison.
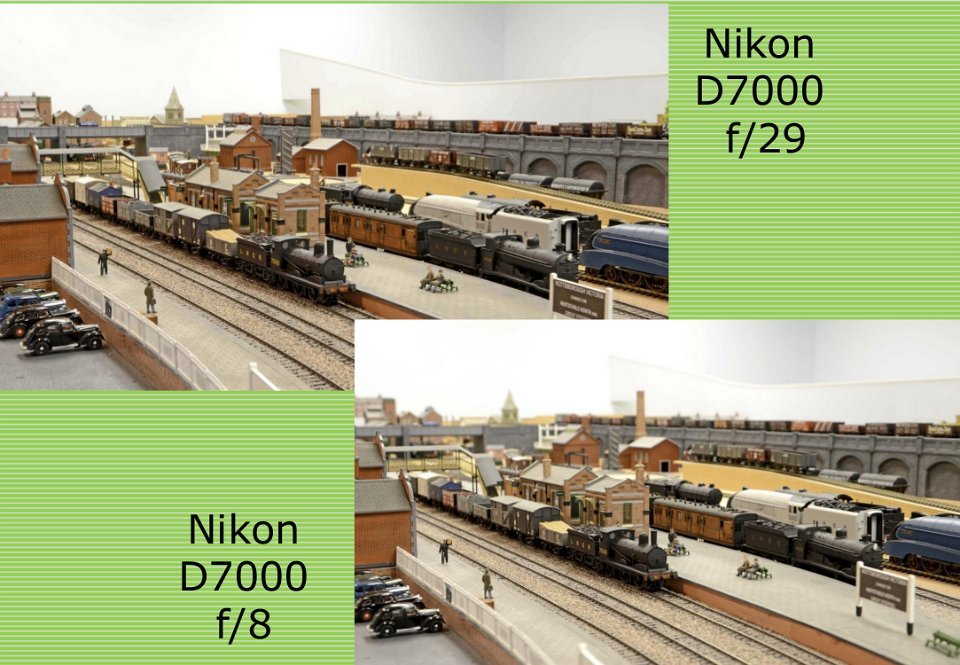
Comparison between smallest aperture on the Nikon and f8 – this shows quite a large difference in depth of field.
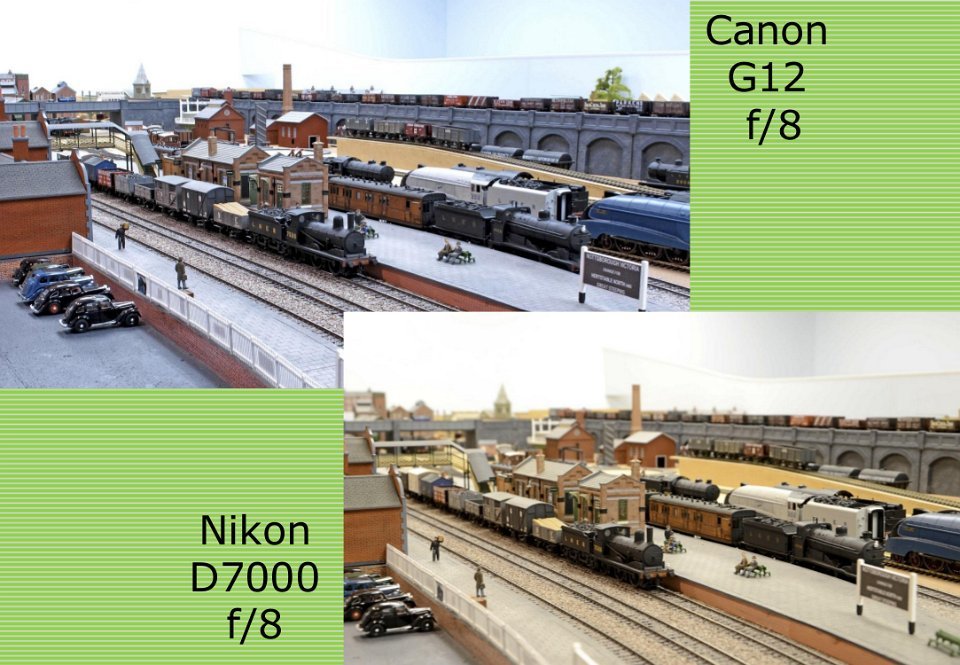
Now comparing the Canon with the Nikon - both set to f8 shows that there is substantial difference with much greater depth of field from the Canon.
The difference in colour between the two cameras is due the light balance which I normally leave on automatic.
The difference in colour between the two cameras is due the light balance which I normally leave on automatic.

Even comparing the Canon at f8 with the Nikon at f29 shows not much difference.


A photo of one corner of my layout taken on the tablet – its has a very wide angle lens and this helps with the depth of field.
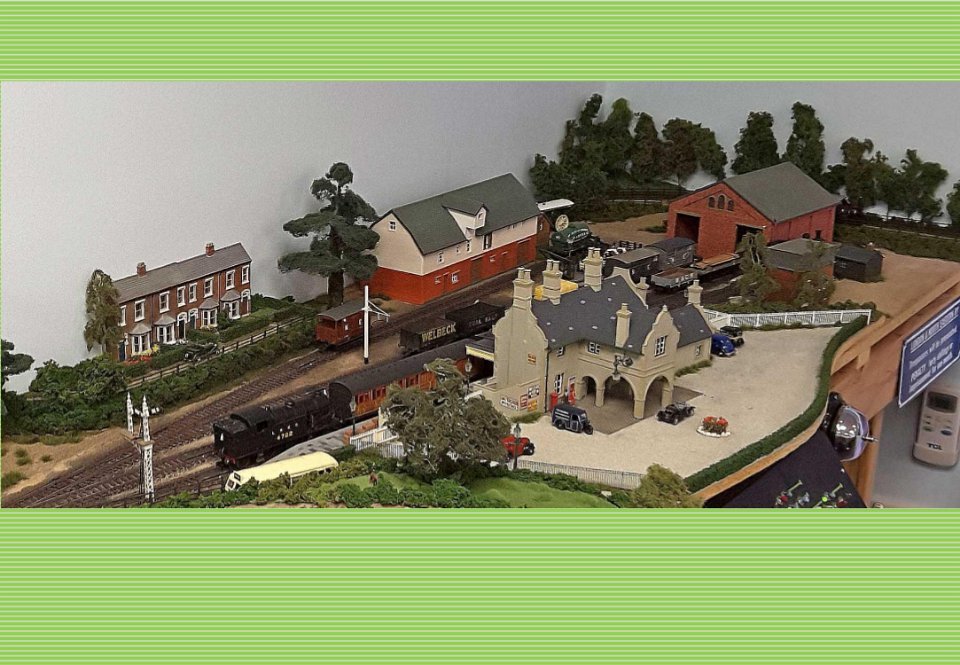
The previous photo cropped to show only the branch station. Its quite 'noisy' in the lower light and you’re not going to be able to use it for publication but still a useful backup if other cameras fail.

Cliff Parsons’ The Gresley Beat taken on the Nikon D7000 in 2013.
Photo on the Left - heavy Nikon on light weight tripod – either the tripod was too light or the floor unstable as some photos taken that day were fine like the top right photo, others were quite blurry.
Bottom right is the top right photo after editing with Photoshop.
Photo on the Left - heavy Nikon on light weight tripod – either the tripod was too light or the floor unstable as some photos taken that day were fine like the top right photo, others were quite blurry.
Bottom right is the top right photo after editing with Photoshop.
Being a railway enthusiast and modeller one of the key tools needed is a camera and the ability to take good photographs for future reference.
In TCH 142 there is an article by Mike McHugh on how one can get reasonable photos using a small simple digital camera – that article covers the use of such cameras very well. The article is also now on our BRMA website. Basically is deals with cameras where you can’t make much in the way of adjustment. So if your camera is a basic point and shoot then the article by Mike is very much for you.
The cameras I use are more sophisticated so we can make those additional features work for us. In this presentation I’m focussing on photographing layouts rather than individual models.